Mortal Shell 2 Tarstones Guide: The System & The Best Picks
Ten slots, four categories, eighty-five tarstones (75 at launch plus ten from Rotten Autumn) — how the Mortal Shell 2 tarstone system actually works, which tarstones to pick in early / mid / late game, and the upgrade order that matters most.
How the tarstones system works
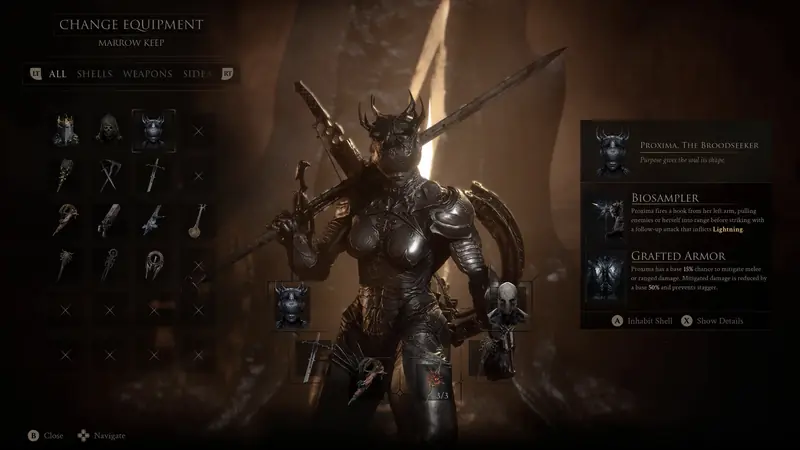
Tarstones are Mortal Shell 2's build engine: 85 stones (75 at launch, plus ten added by the Rotten Autumn update) spread across 4 Support slots (global passives) and 3 slots per weapon and offhand — Ability, Combat, and Infusion. Most tarstones are restricted to specific weapons, so the real decision in Mortal Shell 2 is which tarstones your favorite weapon family actually supports.
Every tarstone you pick in Mortal Shell 2 slots into one of 10 total positions: 4 universal Support slots that affect your entire character, plus 3 weapon slots and 3 offhand slots. The weapon and offhand tarstones are divided into three categories — Combat tarstones modify your attack behavior, Ability tarstones grant Resolve-cost active skills, and Infusion tarstones add elemental or status effects to every hit. Understanding this slot layout is the first step to building around tarstones effectively in Mortal Shell 2.
- Support tarstones (~14) — global passives: crit, stagger, damage reduction, drop rates, Riposte.
- Combat tarstones (~22) — attack behavior mods: multi-hit, pierce, DoT, lifesteal, combo finishers.
- Infusion tarstones (~18) — elemental/status effects: Burn, Lightning, Frost, Poison, Bloodcurse, Curse, Phantom, Stasis, Trauma.
- Ability tarstones (~20+) — active Resolve-cost skills: special attacks, AoE, throws, summons.
All tarstones level to 4 through kills while equipped. Upgrading tarstones requires the Etching Needle (found in a bone chest before Magdalena, Lady of the Woods) handed to Franz in Marrow Keep to unlock the Tarforge; levels 2+ also cost Coins. Balance Patch 1 buffed several tarstones — Parasitic, Grudge and Bulwark stones, plus Clerik's and Squall — making those tarstones noticeably stronger picks in Mortal Shell 2's current meta.
The big twist with tarstones: an Infusion tarstone at max level becomes permanent — the Resolve cost drops to zero and the element stays on the weapon permanently. That makes maxing your primary Infusion tarstone one of the single strongest long-term investments you can make in the game. Once a tarstone hits level 4 in the Infusion slot, it is permanently fused, freeing up the slot or simply keeping the element active at zero cost.
Because there are 85 total tarstones in the game (as of Rotten Autumn, version 1.000.014) and only 10 slots, the system rewards specialization. You will not use most of the tarstones you find, and that is by design — the fun of Mortal Shell 2's tarstone system is discovering which combination of tarstones turns a good weapon into a dominant one.
New stones added by Rotten Autumn (Update 1.000.014, October 20): the announcement adds ten new Tarstones, including one exclusive to the Sheep — but it names no individual stone, so all ten are registered here as count placeholders (ra-tarstone-01 through ra-tarstone-10) with names, effects, and slot restrictions left unconfirmed pending in-game verification. No effect value on this page is fabricated, and none of the new stones enter the best-pick rankings below until their effects are confirmed.
Best tarstones — early game
The tarstones you grab before Magdalena (first 3-4 areas) set the tone for your entire first playthrough. These early tarstones are cheap, universal, and found on the main path — no backtracking required. Prioritizing the right tarstones early means you spend fewer Coins later re-speccing.
| Tarstone | Type | Effect | Why pick it | Location |
|---|---|---|---|---|
| Auspicious Stone | Support | +10 → 15 → 18% melee crit chance | Universal melee boost | Mushroom Village — light 3 candles |
| Bulwark Stone | Support | +10 → 15 → 25% damage reduction | Survival | Defeat Bloodcursed Lithopod at the bridge end |
| Parasitic Stone | Combat | Kills grant 1 → 2 → 3 Leech stacks | Dungeon sustain | Martyr's Tomb, dungeon end |
| Grudge Stone | Combat | Every 10 → 7 → 5 attacks is a guaranteed crit | Reliable burst | Near Citadel of Penance |
| Charged Stone | Combat | Offhand charges 20 → 35 → 50% faster | Ranged pressure | Nameless Path beacon chest |
| Gloombound Stone | Support | +15 → 25 → 40% Gloom drops | Progression farming | Stones of Remembrance, yellow-flower area chest |
Best tarstones — mid game
After the Tarforge unlock, the tarstones system opens up considerably. Now you can invest Coins to push key tarstones toward level 4, and the mid-game tarstones listed below are the ones that transform a struggling build into something that consistently beats harder encounters.
| Tarstone | Type | Effect | Why pick it | Location |
|---|---|---|---|---|
| Headman's Stone | Support | +50 → 80 → 100% melee crit damage | Transformative with Auspicious | SE ruins past Outskirts of Mammon |
| Duality Stone | Combat | Light attacks hit twice | Doubles Resolve generation and damage | Ravaged Tomb dungeon chest |
| Shattering Stone | Support | +1 → 2 → 3% Stagger Damage | Stance-break momentum | Collapsed Mines dungeon chest |
| Arbiter's Prize | Infusion | Bloodcurse | Powerful status effect | Defeat Great Arbiter of Flesh |
| Hand of Rock | Ability | Tracking projectile barrage | Reliable offhand ability | One-Legged Wolf Tavern barkeep, 1,500 Coins |
| Devout Stone | Support | +50 → 80 → 100% Resolve gain | Fuels expensive abilities | Sester's Abbey — hit wall switch left of the left door |
Best tarstones — late game / NG+
Late-game tarstones carry the highest risk/reward ratios. These are the tarstones you commit to once your build identity is locked in — high-maintenance stones that demand specific shells, weapons, or playstyles but payout with enormous damage or survivability in return.
| Tarstone | Type | Effect | Why pick it | Location |
|---|---|---|---|---|
| Berserker's Stone | Support | Below 35/40/50% HP: +130 → 140 → 165% melee damage | Extreme risk/reward | Temple of Vatra summit — light 3 candles |
| Spite Stone | Support | At low HP: +140 → 150 → 160% ranged damage | Ranged burst | Bellkeeper's Corner dungeon — shoot the upper bell |
| Retribution Stone | Support | +20 → 30 → 50% Riposte damage | Boss finisher | Widow's Overlook north trial |
| Magdalena's Memento | Ability | 100 Resolve: aerial chain slash + 100% crit damage | Ultimate boss skill | Defeat the final boss, Glutted Mire Gate |
| Rupturing Stone | Combat | Crits deal 8 → 15 → 20 Break Damage | Offhand synergy | Prisoners' Domain Gate |
Infusion tarstones — full list
Infusion tarstones are the most sought-after category in Mortal Shell 2 because of the permanent-fusion mechanic described above. Every verified weapon Infusion tarstone is listed first, followed by offhand Infusion tarstones (several retail locations still unconfirmed — marked as such rather than guessed). The two most-searched Infusion elements each have a dedicated guide: the lightning tarstone page and the phantom tarstone page, with locations, Resolve costs and shell synergies.
Weapon infusions
| Stone | Element | Resolve cost | At max level | Fits | Location |
|---|---|---|---|---|---|
| Arbiter's Prize | Bloodcurse | 30 | Permanent Bloodcurse | 3 weapons | Defeat Great Arbiter of Flesh |
| Serpent Stone | Poison | 15 | Permanent Poison | 2 weapons | Defeat Lucian, Stonebed Gate |
| Voltaic Crown | Lightning | 30 | Permanent Lightning | 3 weapons | Defeat boss, Nochtean Gate dungeon |
| Warden's Stone | Frost | 30 | Permanent Frost | Great Martyr's Blade (only) | Defeat Urrig, Conquered Temple Gate |
| Curseblood Stone | Curse | 30 | Permanent Curse | 2 weapons | Defeat boss, Gate of Infinity dungeon |
| Nightgrasp Stone | Phantom | 30 | Permanent Phantom | Black Needle (only) | Base of the Tower — light 3 candles |
| Torpor Stone | Stasis | 25 | Permanent Stasis | 2 weapons | Behind the waterfall at Ossinite Falls beacon |
| Wretchcaller's Stone | Trauma | 30 | Permanent Trauma | Obsidian Hammer (only) | Defeat boss, Gate of Mammon |
| Inflamed Clawstone | Burn | 30 | Permanent Burn | Veteran's Battle Axe (only) | Defeat double Grisha, Holding Cells dungeon |
Offhand infusions
| Stone | Element | Resolve cost | At max level | Fits | Location |
|---|---|---|---|---|---|
| Emberseed Stone | Burn | 20 | Applies on crit | 3 offhands | Mushroom Village, Passenger's Shrine |
| Voltaic Amber | Lightning | 20 | Permanent | 2 offhands | Location unconfirmed in retail |
| Frostshard Stone | Frost | 20 | Permanent | Triarch Repeater (only) | Location unconfirmed in retail |
| Accursed Stone | Curse | 20 | Applies on crit | 2 offhands | Location unconfirmed in retail |
| Hag Stone | Trauma | 20 | Permanent | 2 offhands | Location unconfirmed in retail |
| Weeping Stone | Trauma | 20 | Permanent | Ballistazooka (only) | Location unconfirmed in retail |
| Viletongue Hedron | Bloodcurse | 20 | Permanent | 2 offhands | Location unconfirmed in retail |
| Monarch's Vestige | Phantom | 20 | Permanent | Salvaged Trebuchaxe (only) | Location unconfirmed in retail |
Upgrading tarstones & priority order
If you only have the Coins and XP to upgrade a few tarstones, this order gives the biggest payoff per stone. Infusion tarstones generally take priority because of the permanent fusion at level 4, followed by Combat tarstones that directly multiply your damage output.
-
1
Auspicious Stone Support
Universal melee crit — always active -
2
Headman's Stone Support
Multiplies with Auspicious -
3
Devout Stone Support
Fuels Resolve-hungry Tarstones -
4
Bulwark Stone Support
Survival, especially early -
5
Duality Stone Combat
Transformative for light-attack builds -
6
Main Infusion Tarstone Infusion
Permanent at max level — lock it in early -
7
Build-specific Ability Stone Ability
Only when Resolve generation supports it
Tarstones FAQ
Common questions about how tarstones work, answered concisely:
How many Tarstone slots are there?
Ten: 4 Support slots for global passives, and each weapon/offhand has 3 slots — Ability, Combat and Infusion.
What does maxing an Infusion Tarstone do?
At level 4 it becomes permanent — the Resolve cost drops to zero and the element stays active on the weapon.
How do I unlock Tarstone upgrading?
Find the Etching Needle in the bone chest before Magdalena, Lady of the Woods, and give it to Franz in Marrow Keep. Levels 2+ need Coins plus enough XP from kills while equipped.
Which Tarstone should I upgrade first?
Auspicious Stone (universal melee crit), then Headman’s Stone (multiplies crit damage), then Devout Stone if your build is Resolve-hungry.
What changed for Tarstones in Balance Patch 1?
Parasitic, Grudge and Bulwark (damage reduction) were buffed, along with Clerik’s and Squall.
How tarstones interact with the shell system
Each of the eight shells in the game has innate synergies with certain tarstone categories. Tiel, for example, benefits most from tarstones that boost critical hit rate and Resolve generation — his low base HP means every hit needs to count offensively, and stacking crit-focused tarstones amplifies his hit-and-run playstyle significantly. Eredrim, on the other hand, pairs naturally with defensive tarstones like Bulwark Stone and Headman's Stone that extend his already massive HP pool into near-unkillable territory. The interaction between shells and tarstones is what makes the system so engaging — there is no single "best" tarstone loadout, only best pairings for a given shell and weapon combination.
Weapon selection further narrows your tarstone options. Each weapon family supports a specific pool of Combat, Ability, and Infusion tarstones, so choosing a weapon first and then building your tarstone setup around it is the most reliable approach. The Build Planner on this site handles these restrictions automatically — select a shell, pick a weapon, and the planner shows only the tarstones that actually fit. For players who prefer to plan manually, the infusion tables on this page list every confirmed weapon-tarstone pairing so you can map out your build before committing any upgrade resources.
Tarstone farming and general strategy
Farming tarstones is straightforward — most tarstones are one-time pickups from the world, not random drops. A handful of tarstones drop from specific bosses or require completing side quests, but you will never need to grind the same enemy repeatedly for a tarstone. The main resource you manage around tarstones is Coins, since upgrading tarstones at the Tarforge costs Coins on top of the XP earned through kills.
The Gloombound Stone (Support, +Gloom drop rate) is worth grabbing early if you plan to farm Gloom for Shell Memories. Gloom is the currency used to recover Shell Memories scattered across the world, and each Shell Memory unlocks a piece of lore plus a permanent stat bonus. Pairing the Gloombound tarstone with an exploration-focused shell like Proxima or Lazlo turns routine area clearing into productive farming in Mortal Shell 2.
Another strategy tip for tarstones: do not spread your upgrade investment too thin. It is far more effective to fully upgrade three or four tarstones to level 4 than to partially upgrade eight or nine. The level 4 breakpoint on Infusion tarstones is especially important — that is where the permanent fusion kicks in and the Resolve cost vanishes entirely. Prioritize your main weapon's Infusion tarstone first, then your two strongest Support tarstones, then a Combat tarstone that directly multiplies your primary damage type.
When you unlock a new shell in Mortal Shell 2, resist the urge to immediately re-slot all your tarstones. Most Support tarstones are shell-agnostic — Auspicious Stone, Bulwark Stone, Devout Stone, and Headman's Stone work on every shell. The tarstones you should re-evaluate when changing shells are the weapon-bound ones (Combat, Infusion, Ability) since each shell pairs best with different weapons. Check the Best Builds page for recommended tarstone loadouts per shell, or experiment in the Build Planner to see synergy notes update in real time.