
The 5 Best Builds in Mortal Shell 2
Five complete starter loadouts for five playstyles — every component chosen for a reason, every build loadable in the planner in one click.
These builds are community-tested recommendations, not developer-confirmed optimal configurations.
Shadow Assassin
Tiel · Axe and Dagger · Vatra's Seal
Early full-area pushes, boss speedruns, first playthrough pick
Open in Planner →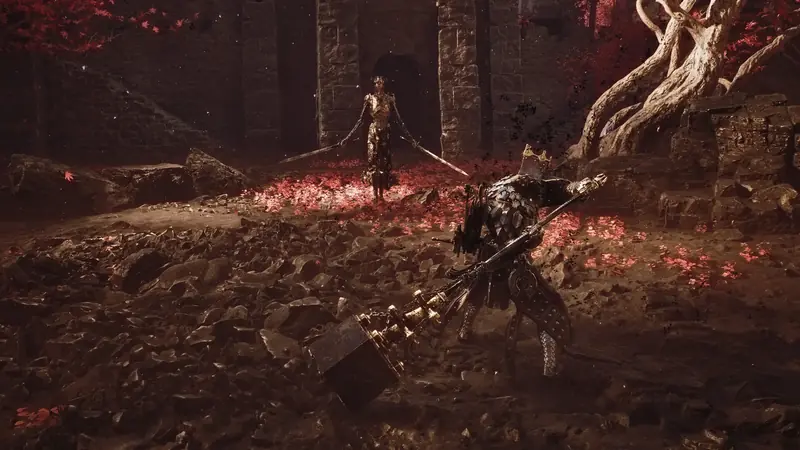
Unbreakable Wall
Eredrim · Obsidian Hammer · Untarnished Seal
First playthrough, learning boss patterns, route clearing
Open in Planner →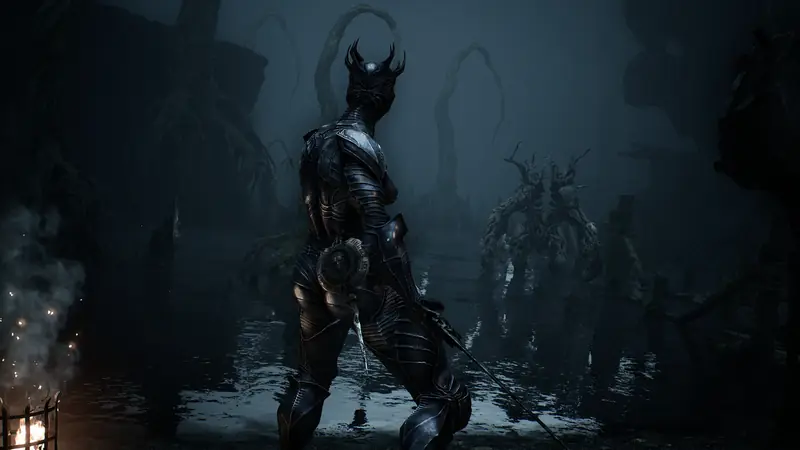
Clone Army
Genessa · Black Needle · Vatra's Seal
Boss fights, safe damage output, high-skill players
Open in Planner →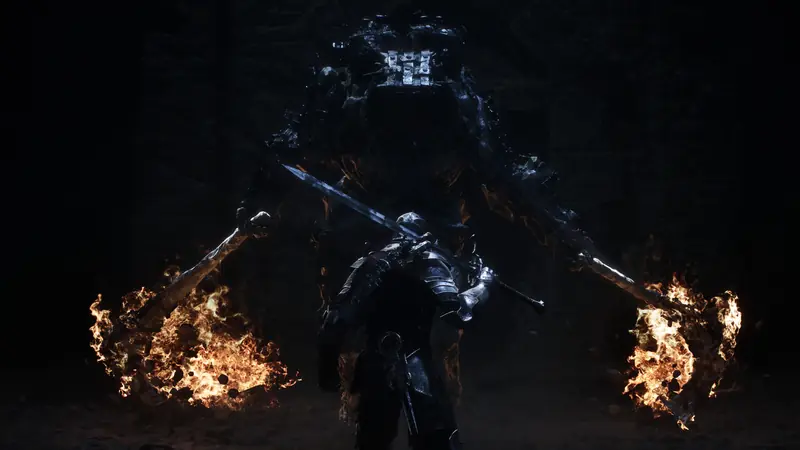
Time Lord
Smert · Axe and Dagger (any fast weapon) · Untarnished Seal
Boss-fight specialist, high risk/reward, one-on-one
Open in Planner →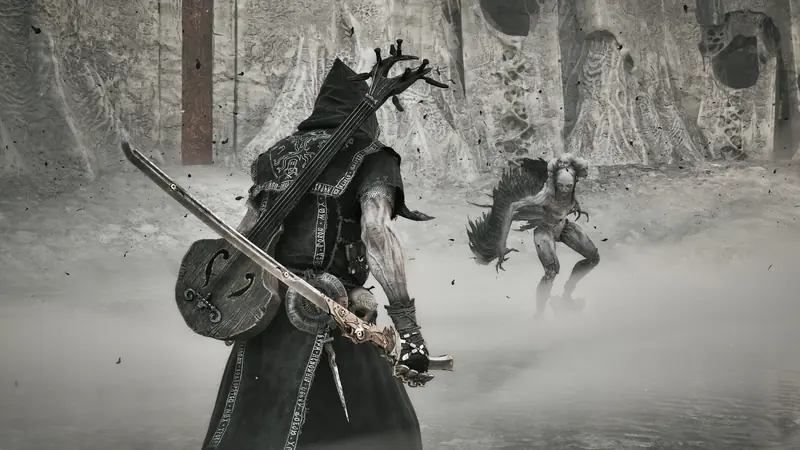
Shock Trooper
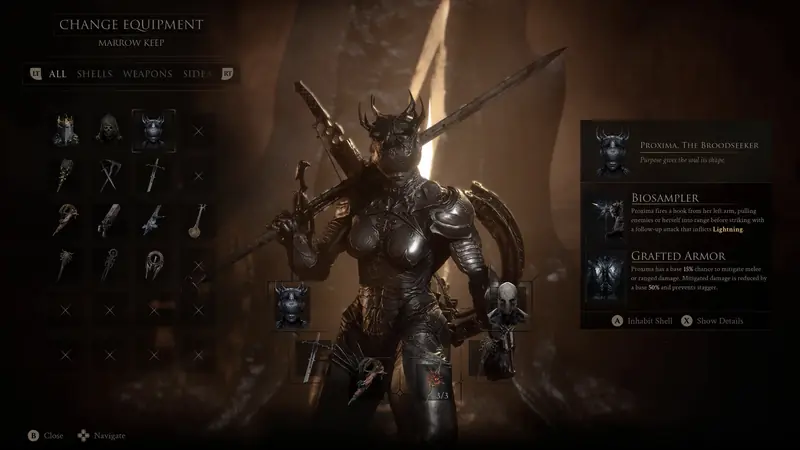
Proxima · Axe and Dagger · Untarnished Seal
All-around progression, beginner first pick, exploration/gold farming, group fights
Open in Planner →Best Mortal Shell 2 Builds (Ranked)
All five starter presets ranked S to B, based on community testing on Hotfix 2.0 + Balance Patch 1 — from the most OP build to the most situational.
Rankings are unofficial and compare the builds as full kits: damage ceiling, survivability, how early the build comes online, and how much of the game it covers. Every preset links to the Build Planner, and each can be tuned into something stronger — the ranks describe the out-of-the-box experience.
S — Best builds overall
A — Excellent, with a catch
B — Situational
Full configuration comparison
Every slot, side by side. Scroll horizontally on mobile.
| Component | Shadow Assassin | Unbreakable Wall | Clone Army | Time Lord | Shock Trooper |
|---|---|---|---|---|---|
| Shell | Tiel | Eredrim | Genessa | Smert | Proxima |
| Main weapon | Axe and Dagger | Obsidian Hammer | Black Needle | Axe and Dagger (any fast weapon) | Axe and Dagger |
| Offhand | Troubadour's Lute | Naylshotte | Caged Hystrix | Mether's Pulse | Hand of Rock |
| Seal | Vatra's Seal (Harden) | Untarnished Seal (Guard) | Vatra's Seal (Harden) | Untarnished Seal (Guard) | Untarnished Seal (Guard) |
| Support 1 | Auspicious Stone Lv4 | Bulwark Stone Lv4 | Devout Stone Lv4 | Devout Stone Lv4 | Bulwark Stone Lv3 |
| Support 2 | Headman's Stone Lv4 | Shattering Stone Lv3 | Auspicious Stone Lv3 | Bulwark Stone Lv3 | Devout Stone Lv3 |
| Support 3 | Bulwark Stone Lv3 | Retribution Stone Lv3 | Headman's Stone Lv3 | Berserker's Stone Lv4 | Shattering Stone Lv3 |
| Support 4 | Devout Stone Lv3 | Gloombound Stone Lv3 | Bulwark Stone Lv2 | Auspicious Stone Lv3 | Gloombound Stone Lv2 |
| Weapon Combat | Grudge Stone | Clerik's Stone | Duality Stone | Grudge Stone | Wounding Stone |
| Weapon Infusion | Serpent Stone Lv4 (permanent) | Wretchcaller's Stone Lv4 (permanent) | Nightgrasp Stone Lv4 (permanent) | Any (unused during Miracle) | Voltaic Crown Lv4 (permanent) |
| Weapon Ability | Acolyte's Stone | Captive's Scabstone | Shrike Stone | Any (unused during Miracle) | Infused Stone |
| Best for | Early full-area pushes, boss speedruns, first playthrough pick | First playthrough, learning boss patterns, route clearing | Boss fights, safe damage output, high-skill players | Boss-fight specialist, high risk/reward, one-on-one | All-around progression, beginner first pick, exploration/gold farming, group fights |
| Watch out | Low HP — one mistake shells out. For beginners who already learned basic Harden timing. | The most forgiving starter build. Low Resolve limits ability frequency. | Late unlock (requires defeating Sester Secundus). Extremely Resolve-hungry. | Every Miracle costs 50% current HP; Overtime snowballs. Recommend the Last Vow talent to go weaponless. | Most recommended first-playthrough build. No boss required to unlock. Generalist. |
| Load in Planner | Load in Planner | Load in Planner | Load in Planner | Load in Planner |
What makes a good build in Mortal Shell 2
Mortal shell 2 handles resource management differently from most soulslikes. There is no stamina bar — your two resources are Durability (effectively your HP pool) and Resolve (spent on abilities and weapon arts). Good builds in mortal shell 2 work within this system by stacking recovery options and front-loading damage before enemies chip your Durability down. Every build on this page was assembled with that constraint in mind.
Your 10 Tarstone slots are the backbone of any build. Four support slots, three weapon slots, and three offhand slots give you a lot of room to specialize, and how you distribute your stones across those categories makes or breaks a configuration. The trick is synergy: support Tarstones that shore up your shell's weakness are usually more valuable than raw stat boosts. For example, a low-Durability shell benefits far more from a flat damage-reduction support stone than from a marginal crit chance increase. Infusion stones deserve a special callout — once you level an Infusion stone to max, its effect becomes permanent on that piece of gear. That means early investment in the right Infusion builds compound over time, turning a mid-tier weapon into something that carries you through half the game. Plan those upgrades carefully, because reallocating them later is not trivial. All five builds on this page account for these slot categories and demonstrate how to allocate them effectively.
Your four Seal options — Guard, Harden, Parry, and Gloomslayer — also shape what a build can realistically do. A Parry-focused build lives or dies by timing windows and benefits hugely from crit-scaling Tarstones. A Guard or Harden build wants flat damage reduction and Durability regeneration support stones. Gloomslayer opens up unique interactions with certain Tarstones that boost damage against specific enemy types. Matching your Seal choice to your Tarstone loadout is what separates decent builds from great builds in mortal shell 2. The best builds pair their Seal and Tarstone choices into a cohesive strategy rather than mixing random strong options. Think of the Seal as the identity of your setup and the Tarstones as the support structure that enables it.
How to choose between these 5 builds
Picking the right build comes down to playstyle preference and how much risk you are comfortable with. There is no wrong answer — each of the five options below has been validated against multiple boss encounters in the current patch. Here is a quick breakdown of each option and who it fits best.
Shadow Assassin (Tiel) — This is the high-risk, high-reward pick. Shadow Assassin builds lean into backstabs, critical hits, and fast dodging. If you enjoy reading enemy attack patterns and punishing whiffs, this build maximizes that style. It is not forgiving: one missed dodge can shell you out fast. Experienced soulslike players gravitate toward these crit-heavy builds.
Unbreakable Wall (Eredrim) — The tank. Unbreakable Wall builds stack damage reduction and Durability so you can face-tank through boss combos that would shred other setups. If you are new to the genre or just want to learn boss movesets without constant dying, this is the build to start with. Eredrim's naturally high Durability pairs perfectly with Guard or Harden Seals, making it one of the most stable builds in mortal shell 2. You can focus on learning attack patterns instead of managing your health bar, which makes it an ideal teaching tool for the game's core combat loop.
Clone Army (Genessa) — A summoner playstyle. Clone Army builds revolve around spawning and buffing allies that draw aggro and add DPS. This build lets you control the battlefield at range while your clones do the heavy lifting. It is a late-game specialist because the best support Tarstones for summon scaling unlock deeper into mortal shell 2's world. Few loadouts can match its area control once fully online. Positioning matters more than raw DPS here — placing your clones where they can distract multiple enemies at once is the key skill to develop.
Time Lord (Smert) — Built around Smert's time-stop mechanic. Time Lord builds freeze enemies in place, giving you wide windows to land heavy attacks or reposition. The playstyle feels uniquely powerful in mortal shell 2 because so many bosses have long attack strings that become free punish opportunities when time is stopped. These require you to manage Resolve carefully since time-stop eats into your ability resource. When executed well, the time-stop window lets you land a full weapon art combo that would be impossible to squeeze into a normal dodge-punish rhythm.
Shock Trooper (Proxima) — Lightning damage and crowd control. Shock Trooper builds chain stuns and apply voltage stacks to keep enemies locked down. Proxima's kit is forgiving and available early, making this an excellent second option to try after you learn the ropes. The CC-heavy playstyle is also effective in group encounters where other setups might get overwhelmed. These builds carry you through the mid-game comfortably.
Why there's no preset Sariel build on this page — and how to build one anyway
Our five preset builds use Tiel, Eredrim, Genessa, Smert, and Proxima. Sariel, the Endless isn't among them — not because the shell is weak (shells.json ranks it tier A, "highest survivability ceiling, highest skill floor"), but because its Pain-sustain loop rewards players who already understand the game's core rhythms. That is exactly why the community searches for it.
If you want to assemble one from this page's planner, the shell data gives you the pillars:
- Core loop: Purge converts 50% of incoming damage into Pain — recoverable grey health (shells.json hp_note). Aggression is mandatory: Exodus of Thorns self-inflicts Pain, and the loop only sustains if you keep attacking.
- Active: Exodus of Thorns — tracking thorns apply Curse stacks; enough Curse makes an enemy's next melee attack whiff and reflects damage.
- Talents shells.json rates high: Pain mitigation, full damage-to-Pain conversion, Trauma stacks (shockwave on Purge), and the Frailty/Reaper/Restoration sustain group.
- Unlock cost: this is the hardest shell to reach on this page — a two-phase boss fight (Sariel in Mammon) where you must destroy the lightning rods to disable revival. Also drops the Clockwork Scythe.
Open the planner, pick Sariel as the shell, and any heavy weapon fits the attrition style — the page's five presets remain your reference for stone/seal patterns.
Building around Genessa's Duality (Stray form)
Genessa, the Wayward is one of two S-tier shells in our ranking ("highest DPS ceiling, boss strat shell"). Its passive Duality is the reason boss-fight players search for it: on HP depletion you become a Stray instead of shelling out, and the Stray form produces Stray Doubles that copy your attacks.
- The preset: our Clone Army build (Genessa + Black Needle) is the page's Genessa configuration — clones perform your weapon attacks, including Infusion and Tarstone effects, then vanish.
- Resolve management is the real build constraint: shells.json notes Genessa is "extremely Resolve-hungry; must keep attacking to sustain Faithful Doubles." Any Genessa build lives or dies on Resolve generation, not on raw damage stats.
- Two fixed interactions worth knowing: cancelling Mether's Severance with a gamepad could soft-lock the game and leave Stray Genessa non-interactable — both fixed in Hotfix 1.000.011 (Sept 24) [fixes.json #33]. Faithful Doubles misbehaving with the Lost Clotstone is also fixed [fixes.json #39]. Update before you build around her.
Which shell should a beginner pick? Proxima, and the Shock Trooper build
Proxima, the Broodseeker is rated the most beginner-friendly shell (TheGamer, echoed by multiple community sources) — and it's the only beginner case where this page has a full preset: Shock Trooper (Proxima + Axe and Dagger + Hand of Rock + Untarnished Seal). Why it fits a first playthrough:
- No boss required to unlock — Proxima is found in Fainweald (Blackridge Pass Beacon → past the Treant → Shattered Beacon dungeon). Several other strong shells sit behind hard fights.
- Zero-effort mitigation: the Grafted Armor passive gives a 15% base chance to reduce melee and ranged damage, and mitigated hits deal 50% less damage with no stagger (shells.json).
- Built-in crowd control: the Biosampler hook pulls weak enemies to you — or pulls you to big ones — with lightning damage-over-time on follow-ups. It also harvests biosamples you can sell to Merrick for gold.
- The build's own words: "Most recommended first-playthrough build. No boss required to unlock. Generalist." (builds.json shock-trooper.warning)
One honest caveat from our tier data: Proxima is tier A, not S — S-tier Tiel and Genessa out-damage it, but both punish mistakes. If you want the smoothest first 20 hours, Shock Trooper is the safer entry; swap to a higher-ceiling shell once Harden timing is muscle memory.
Understanding the relationship between shells and builds
In mortal shell 2, your shell is the foundation and your build is the architecture on top of it. Shells determine your base Durability, Resolve pool, and innate passive. Builds then amplify or compensate for those starting points through Tarstones, Infusion stones, and Seal selection. This relationship matters because a build that looks strong on paper can underperform if the shell it is built on does not support the strategy.
Take the Shadow Assassin builds as an example. Tiel has low base Durability, so the build compensates with support Tarstones that boost dodge range and crit damage. If you tried to run those same Tarstones on Eredrim, you would waste the shell's natural tankiness on a playstyle that never gets hit. Conversely, slapping tank support stones onto Tiel does not magically make Unbreakable Wall — the base stats just are not there. Good builds in mortal shell 2 respect what each shell naturally does well and build outward from that strength.
The 10 Tarstone slots give you flexibility, but they cannot fully override a shell's identity. When you browse the builds above, notice that each one is anchored to a specific shell for a reason. Swapping shells without rethinking your Tarstone and Seal configuration usually produces a weaker result than picking the build designed for that shell. Understanding this shell-build pairing is key to getting the most out of every build you run.
The takeaway here is simple: let the shell lead, and let the Tarstones and Seal follow. Each of the five builds on this page was designed bottom-up from its shell's stat profile. If you want to experiment, start from a complete build and make one change at a time — swap a single support Tarstone, or try a different Seal — and feel the difference before making further adjustments. That iterative approach will teach you more about mortal shell 2's systems than jumping between completely different configurations.
How to customize builds in the planner
Every build on this page has a one-click load button that opens it in the Build Planner. Once loaded, you can swap any Tarstone, change your Seal, or try a different weapon — the planner updates the stat summary in real time. The share link saves your exact configuration so you can bookmark it or send it to friends.
When customizing builds, start with the four support slots. These have the largest impact on how a build feels because they modify your core defensive and utility stats. After that, tune the three weapon Tarstone slots to match your preferred damage type. Offhand slots are situational — swap them based on whether you need more survivability or want to commit to a specific weapon art combo. Most builds only need one or two offhand tweaks to feel completely different.
Remember the Infusion stone rule: once you max an Infusion stone, it is permanent on that gear piece. The planner simulates this so you can preview the final stats before committing resources in-game. If you are experimenting, keep Infusion stones at non-max levels in the planner until you are sure about the build direction. The best builds often start as planner experiments that get refined over multiple play sessions. Treat the planner as a sandbox for your builds before you spend hard-earned materials in mortal shell 2.
One common mistake when customizing is chasing too many bonuses at once. A build that tries to boost crit damage, elemental damage, and Durability regeneration all at once usually ends up mediocre at everything. Focused builds with a clear damage type or defensive identity consistently outperform scattered ones. The planner's stat summary helps you see whether your changes are moving the needle in one direction or spreading your power too thin across multiple stats.
When to swap builds during a playthrough
Mortal shell 2 rewards adaptability. You are not locked into one build for the entire game, and some of the most effective strategies involve switching builds between major encounters. A common pattern is to run a safe build like Unbreakable Wall while learning a new boss, then swap to a higher-damage build like Shadow Assassin or Time Lord once you know the timing.
Area transitions are natural swap points. If you are moving from a zone with lots of grouped enemies into a one-on-one boss arena, the crowd control focus of Shock Trooper builds becomes less relevant while single-target setups shine. Similarly, Clone Army builds excel in areas with multiple tough enemies but lose efficiency against solo bosses where your clones have nothing to distract. Do not be afraid to experiment — the cost of swapping Tarstones is low, and you learn a lot by trying different configurations.
As you progress through mortal shell 2, you will also unlock higher-tier Tarstones that can dramatically change what your builds are capable of. Re-evaluating your build every few hours of gameplay is a good habit. Load your current setup in the Build Planner, compare it against the updated builds on this page, and see if a component swap would close a gap you have been feeling. Builds are tools — use the right one for the job in front of you.
Keep in mind that some Tarstones only drop once per playthrough. If you invest a rare stone into an early build and later want it for a different configuration, you may be out of luck until New Game Plus. This is another reason the planner is valuable — it lets you preview whether a rare Tarstone actually improves your current setup before you commit it. The builds on this page were designed with common, repeatable Tarstones wherever possible so that new players can assemble them without fear of wasting limited resources.
How to use these builds
Each build above targets a different point on the risk ↔ forgiveness spectrum. If this is your first soulslike, start with Unbreakable Wall (Eredrim) or Shock Trooper (Proxima) — both shells unlock without a boss fight and forgive mistakes. Shadow Assassin scales your damage ceiling but one mistake shells you out. Clone Army and Time Lord are late-game specialists.
Tarstone locations and the reasoning behind each support pick are in the Tarstones guide; shell rankings and unlock routes are in the Shell Tier List; and if you are still choosing the weapon at the center of the build, our weapon build guides compare every tracked arm by shell pairing and infusion fit. To swap any component, load the build in the Build Planner and adjust from there — the share link keeps your edits. These builds were tested against Hotfix 2.0 and Balance Patch 1, so if a future patch shifts numbers, check the version badge at the top of the page and revisit the planner for updated configurations.
Do not feel pressured to commit to a single build on your first run. Mortal shell 2 is designed to encourage experimentation, and the Tarstone system supports respeccing without heavy penalties. The five builds here cover the main archetypes the community has found most effective so far, but the real fun starts when you tweak them to match your own instincts and preferences. Load one into the planner, change a few pieces, and see what happens — that hands-on process is how most players discover their personal favorite configuration.
Builds FAQ
Can I use any shell with any build on this page?
Each build is designed around a specific shell because Mortal Shell 2's stats — Durability, Resolve generation, passives — are tied to your shell choice. You can swap a build to a different shell, but the Tarstone and Seal configuration will need adjustments. The Build Planner lets you test shell swaps instantly and shows synergy warnings when a pairing does not work well.
Do these builds work on New Game Plus?
Yes, with caveats. NG+ enemies have higher stats, so builds that rely on margin-for-error (like Shadow Assassin on Tiel) become riskier. Tank-oriented builds like Unbreakable Wall scale more naturally into NG+. The Tarstone system carries over, so your Infusion stone investments remain permanent regardless of playthrough number.
What happens if a patch changes Tarstone stats?
Check the version badge at the top of this page. When a new balance patch drops, we retest and update. If you see a discrepancy between this page and your in-game experience, load your build in the Build Planner and check whether the synergy notes still recommend your current configuration.
Are these builds viable on Steam Deck?
Yes. The game runs at roughly 30 FPS on Steam Deck with proton-11.0-2RC, and all five builds are playable at that framerate. Build-dependent timing (Parry-focused setups) is slightly harder at lower FPS, but Guard and Harden builds are unaffected. See our Steam Deck guide for optimized settings.
Does Adaptive Difficulty change these builds?
No. Adaptive Difficulty is an experimental, opt-in feature that is off by default, and every build on this page is tested against the game in its default state. Because the setting only alters enemy scaling when you enable it yourself, it does not change the Tarstone picks, Seal pairings or viability ratings recommended here. A full walkthrough of what the system does and does not change lives in our Adaptive Difficulty explained guide.
Can I share these builds with friends?
Every build has a one-click load button that opens it in the Build Planner with a shareable URL. Copy the link and send it — anyone who opens it sees the exact configuration. No account needed.